Creating Annotation Project
In this section you will learn how to create a new annotation project.
The process of creating a new annotation project starts with:
- Info: Adding details like project name and description.
- Project Files: Adding appropriate image or images that you want to annotate or tag.
- Categories: Inserting the relevant project categories. This depends on the images that you are adding. For example, you add images of a city, then you can add categories like buildings, roads, parks, and so on.
- Project Members: Adding members to the annotation project. These members will have read-write access to the project.
To start creating a new annotation project, do the following:
-
Login to platform.
-
Click the Collaborate module and then proceed to click the Annotation Project sub-module.
The Annotation Projects homepage is displayed.
-
In the Annotation Projects homepage, click the Create Annotation Project tile to start a new annotation project.
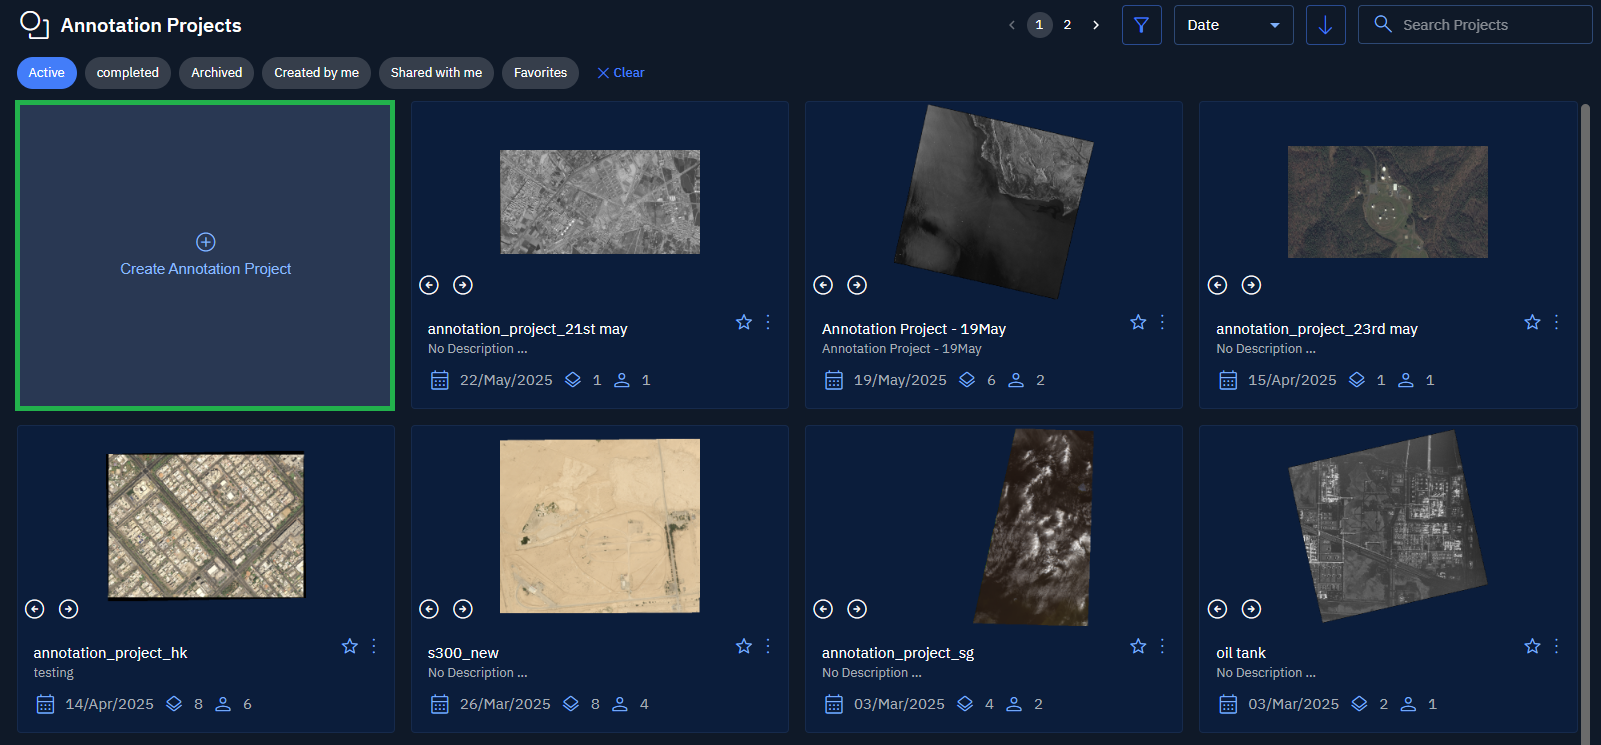
The New Annotation Project dialog box is displayed.
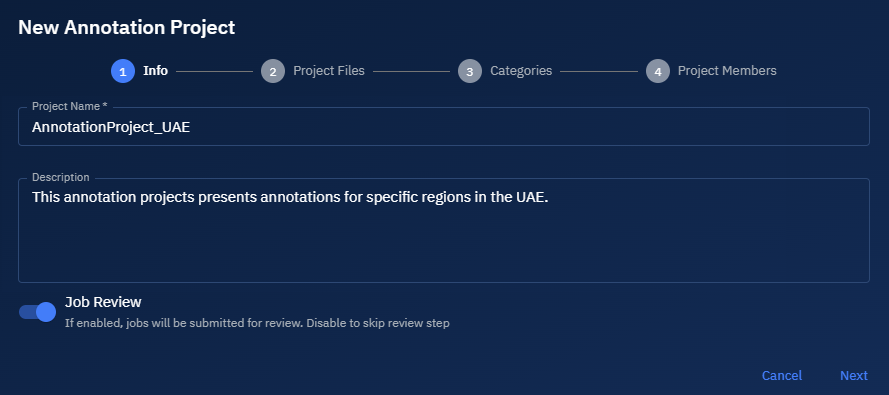
Info: Adding project details
- In the New Annotation Project dialog box, under the Info tab, do the following:
-
Type the name of the project and the description in the Project Name and Description fields.
-
Turn on the Job Review toggle to submit thee annotation project for review.
-
Click the Next button.
-
Project Files: Adding images to annotate
- In the New Annotation Project dialog box, under the Project Files tab, do the following:
- Click the Filter icon to find and add appropriate images that you want to annotate.
- Click the Next button.
Categories: Adding relevant categories
- Search and select relevant categories and then click the Next button.

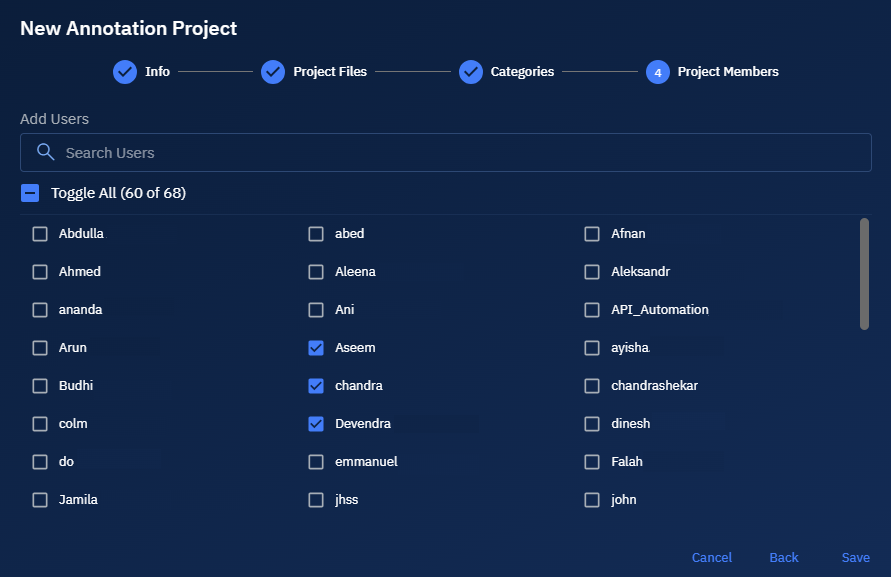
Project Members: Adding team members to the project
- Search and add members to give access to the annotation project. Proceed to click the Save button.
A new annotation project is successfully created.
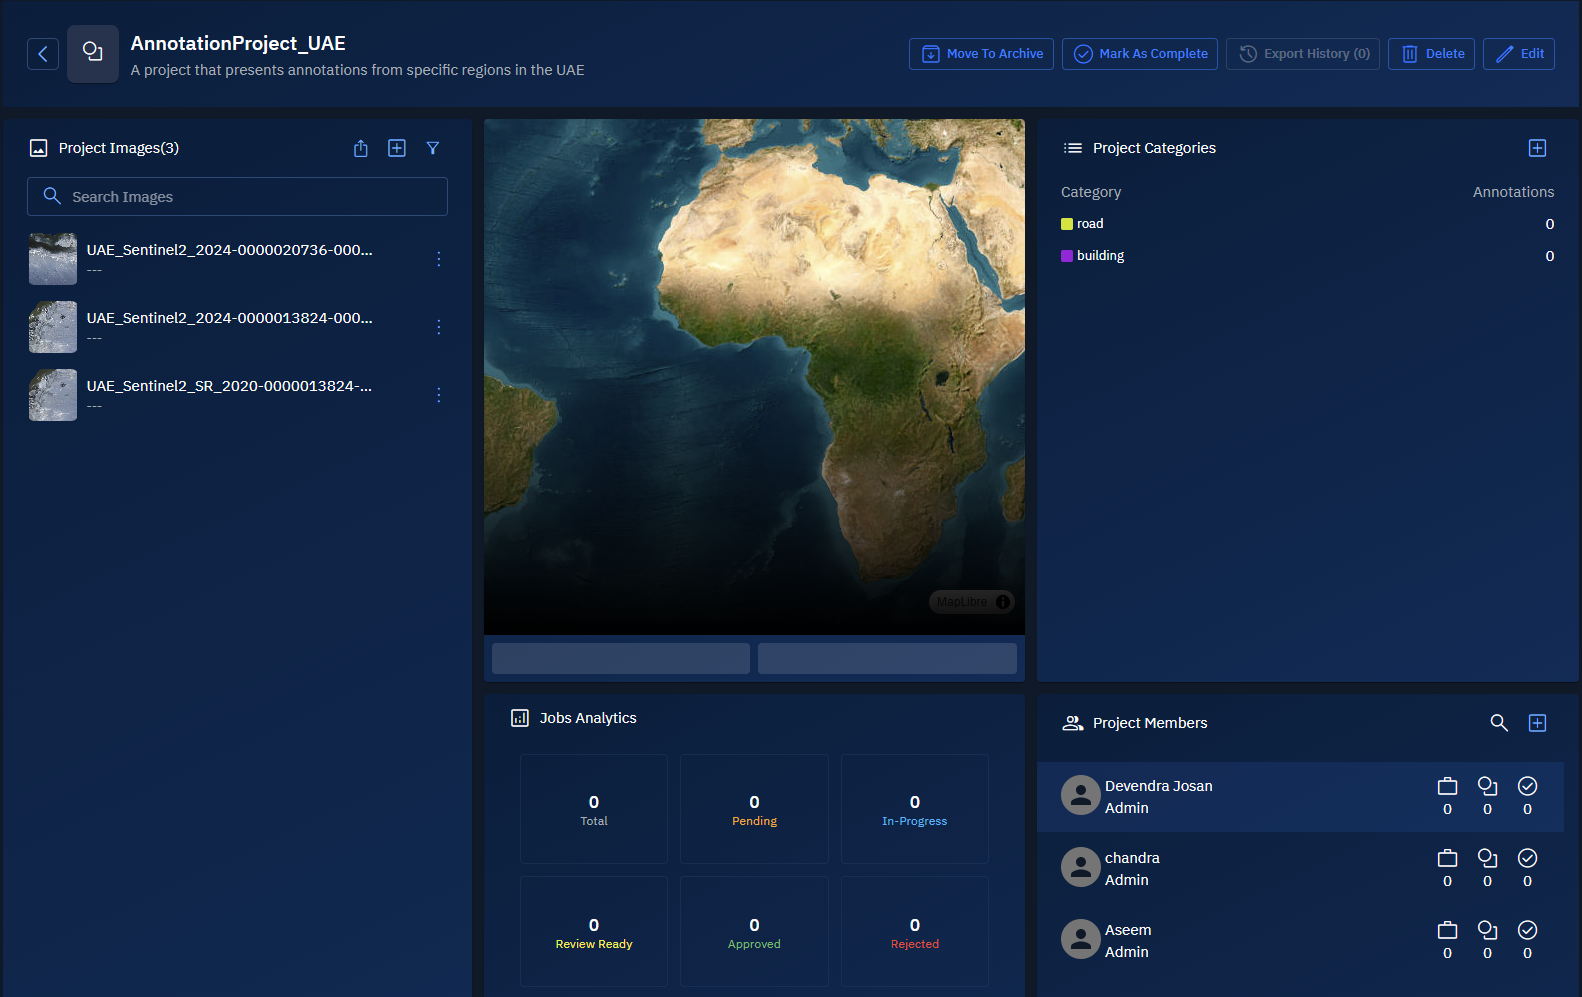
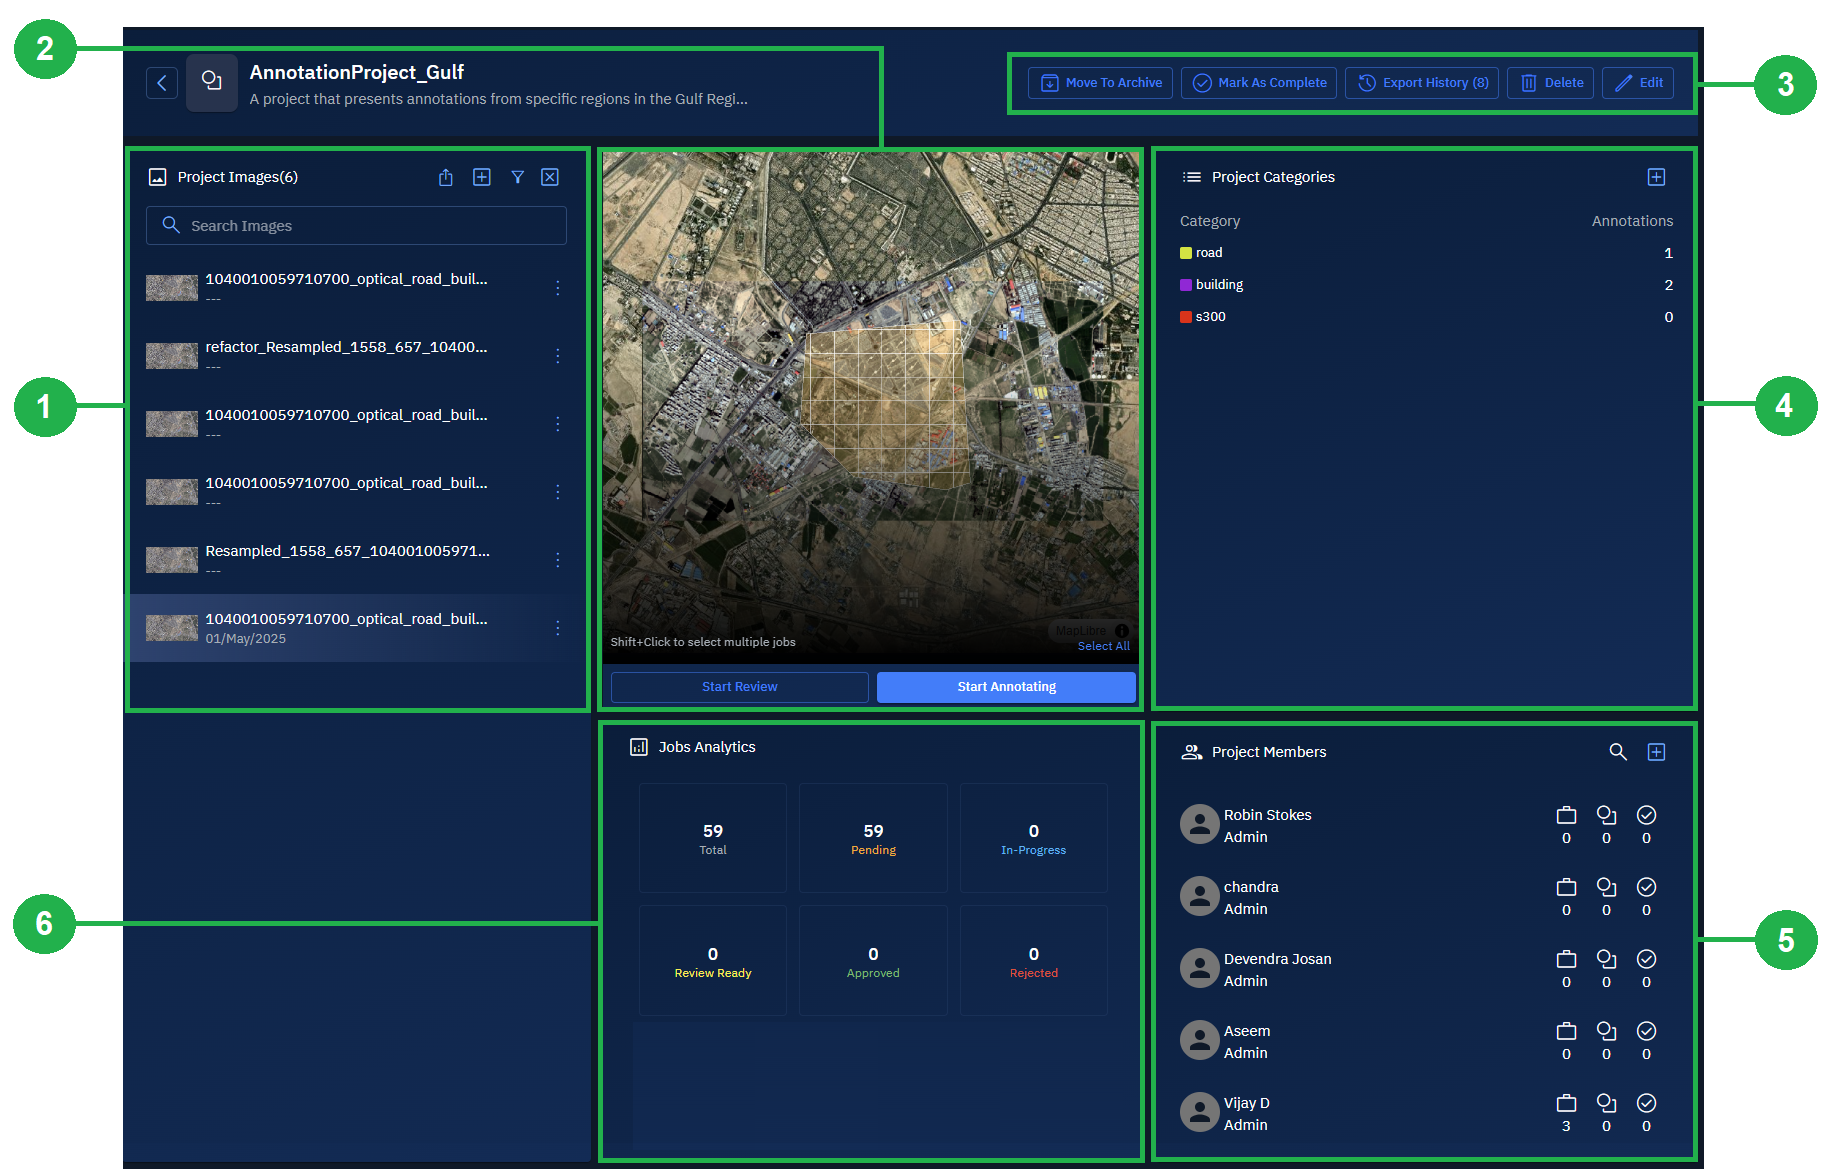
Getting to know an Annotation Project
In this section, we will get to know the different components that make up an annotation project and how you can use these components to take various actions and execute tasks.
Annotation Project page displays the following:
| Number | Panel Name | What You Can Do Here |
|---|---|---|
| 1 | Project Images panel | Browse all images in your project. Export annotations, add new image layers, or filter images by acquisition date to quickly find what you need. |
| 2 | View Image panel | View individual images and created jobs. Create single or multiple annotation jobs, and assign these jobs to project members or annotate images yourself if you have permission. |
| 3 | Actions menu | Manage your project by archiving it, marking it complete, viewing export history, downloading annotations locally, deleting the project, or editing its details. |
| 4 | Project Categories panel | Organize your work by viewing existing categories and adding new ones to help structure annotations effectively. |
| 5 | Project Members panel | Manage your team. Add new members and track their stats, including pending jobs, total annotation count, and approved annotations to ensure balanced workload and quality. |
| 6 | Job Analytics panel | Monitor progress at a glance. See the total number of jobs and their statuses: pending, in progress, review ready, approved, and rejected—so you can keep your project on track and address bottlenecks quickly. |